

My school's Algebra 2 class will typically use the last few months of the year to complete a giant creative project, selected by the students. This year, we decided to build a life-size Rubik's Cube, complete with RGB lights and placed in the center staircase of our school for all to see.
The class has an organized leadership structure for the project, with a coding team, finance/PR team, an art team, and a build team - my role in the project is the leader of the code team. Project managers oversee everyone's work, communicate with the teacher, and ensure that the project stays on track.
Planning and Design
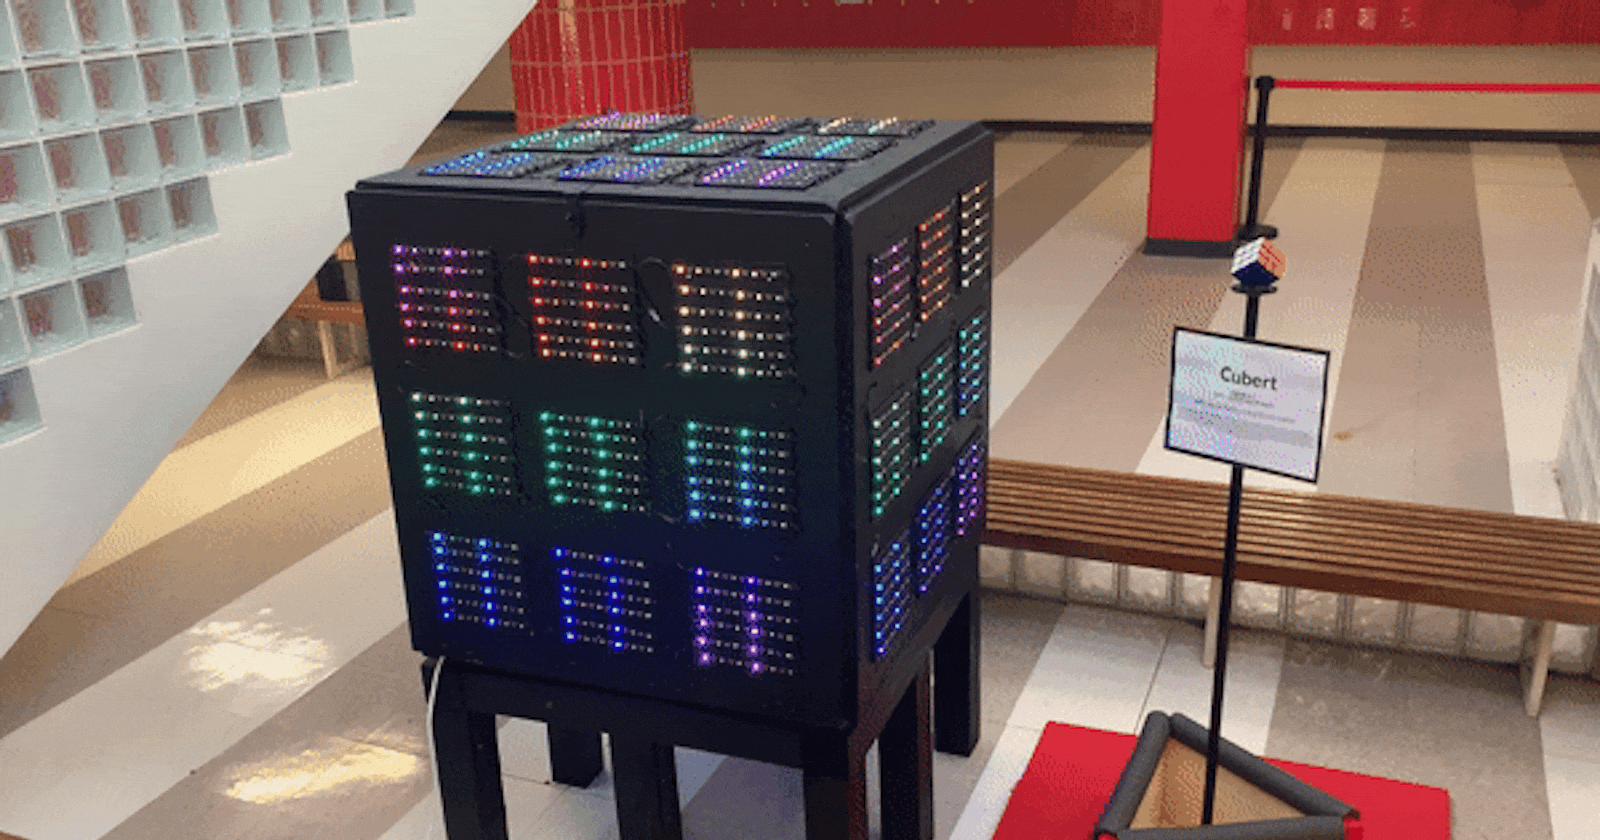
The cube is going to have 6 faces, each 3 feet square. Standing it on its corner will give it more height (space diagonal of more than 5 feet). Instead of physically turning like a normal Rubik's Cube, our class decided to blanket the faces with Neopixel lights, which will shift and move to give the illusion of turning; the cube will be able to scramble and solve itself, in addition to being able to flash cool animations. To control the lights, we're using an Adafruit Feather M4 (32-bit, 120 MHz, and 192KB RAM!), one of the most powerful MCUs out there - it's like an Arduino on steroids.
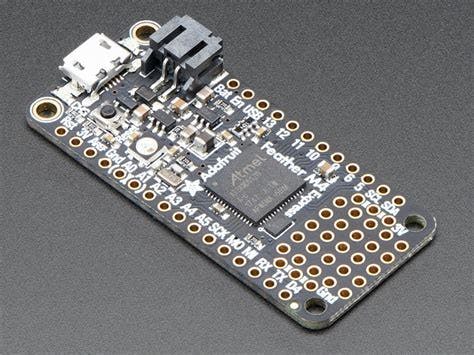
^ Adafruit Feather M4
The entire cube will be constructed out of plywood - 3-foot squares for each of 6 faces. Each face will have 9 8-inch balsa wood panels for each sticker of the cube, and every panel will have 36 Neopixels glued on and soldered together. Multiplying everything out yields 1,944 lights, which should be easy for the M4 to handle.
In order to send commands to the Feather and control it remotely, we're going to run a Raspberry Pi 3 with a Python Flask web server and the Serial library, sending data over USB.
The better part of a month or so was spent researching, debating, and switching between lots of possible microcontrollers/Neopixels/materials before deciding on the ones above - I have the tendency to change my mind a lot, so this was pretty hard. So far, the materials we've tested have worked great and I'm sure they will be able to last for years to come.
Here's the wiring diagram if you're curious:

Fundraising
The finance team created an excellent GoFundMe to raise money for materials (wood, electronic components, and the occasional pizza) - it's raised over $2500 to date.
Additionally, a giant movie night was organized at our school that raised another boatload of cash. We're rich 😈 :)
Code
The cube is going to be programmed with Arduino/C++, which is a huge pain for me - I'm used to working with Python. However, it's the only language that's fast enough to control thousands of Neopixels in real-time and is well-supported by the Feather. We're using the basic Adafruit_NeoPixel library to simplify data transfer, but anyone who's worked with 3D lighting can tell you that it's not an easy job. Making huge data tables to hold frames of animation has been taking up a good chunk of our time.
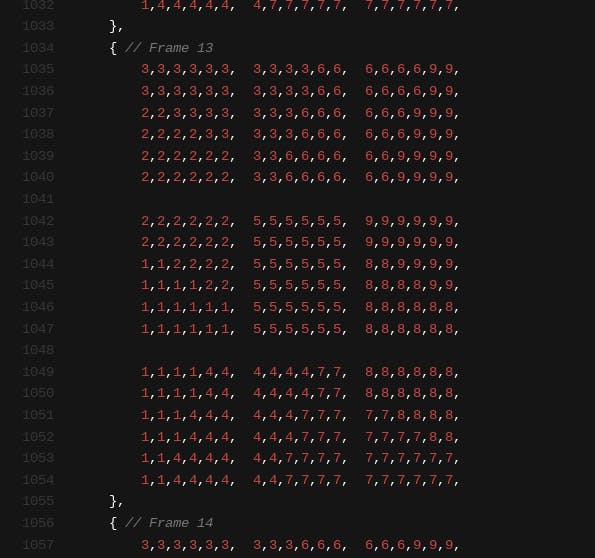
- This is pretty painful. Note the line count on the side
Our source is periodically being published to Github if you want to check out our progress.
Progress so far
As of today, May 3, we've completed:
- 42 out of 54 panels
- Assembled 2 faces
- Animation data for turning the face
I've been working overtime since we have so much work to do in so little time - the school year ends in three weeks. Still, I'm confident that it will be completed by then if everyone works together, and the result will be absolutely epic. Stay tuned for Part 2.
Update 6/6: Part 2 is published